Showing posts with label Accuquilt GO. Show all posts

Friday, February 3, 2012

Long Time Away

Hello there.  It has been a long time since I have been able to post in my blog, but I am back finally!

Life has been very busy here but I think things are about to settle into a nice routine in anticipation of Spring.

Christmas and New Years went well this year and thankfully quiet and uneventful.  My sister travelled home from BC and arrived safely in Ontario.  I have to say that winter driving across Canada in the winter is not the safest idea, but all went well and I am happy to have her home!

The fall was full of sewing projects, just not stuff that was for us.  As you all know I was sewing for the production of Annie that my daughter was in, which went very well.  Then our group was asked to go straight into helping the ladies who were sewing for the production of The King and I.  It was CRAZY busy and very different from sewing for Annie.  You might say from Rags To Riches!  Sewing silk and Satin are not my favourites as I don't like the "fray factor".  However, it all turned out well and the show was a great success.

On health notes, my hubby is doing remarkably well and has been able to stop Chemotherapy!  This is a huge relief and a great blessing.  He is recovering from the side effects and has been able to go back to work.  That has made him so incredibly happy, he is like a new man.
My best friend Bee also had her latest surgery and all went well.  She is home recovering.

Aside from sewing for Christmas gifts, which I really didn't get a chance to take pictures of due to the severe lack of time left after The King and I, I spent a good deal of our holiday time sewing a quilt for Bee to take to the hospital with her.  It was her birthday gift, just a little late, since her birthday is boxing day and I didn't get it done until the first week of January!  It arrived in time to go to the hospital though and that was all that mattered.


The quilt top was a "rescue" from our local Value Village and was originally intended as a practice quilt for learning free motion quilting on my new sewing machine but it was her favourite colour and she needed it in a hurry.  Since it was already in the machine and underway, I just changed what I was going to do with it to something that suited the occasion.

Her "people"!
Encouragement


I stitched the names of all her family, friends and pets into the boarders along with some words of encouragement and added die cut GO! Ribbons in the colour of the Endometriosis campaign along with an official ribbon to the centre of the quilt.  This worked great and was a total relief because before it was going to be Bee's quilt, I had NO IDEA what was going to happen in the middle of this quilt!


I wanted her to feel wrapped in the love of everyone close to her during her stay at the hospital and she loved it.  Each stitch reminded her of how much she is loved and why she needed to pull through this surgery.

She is now home safe and snuggling up with her quilt healing.

I'll be back soon to fill you in on the project that is consuming all of my time now shortly!

Sunday, October 16, 2011

Stylish Pincushion Tutorial

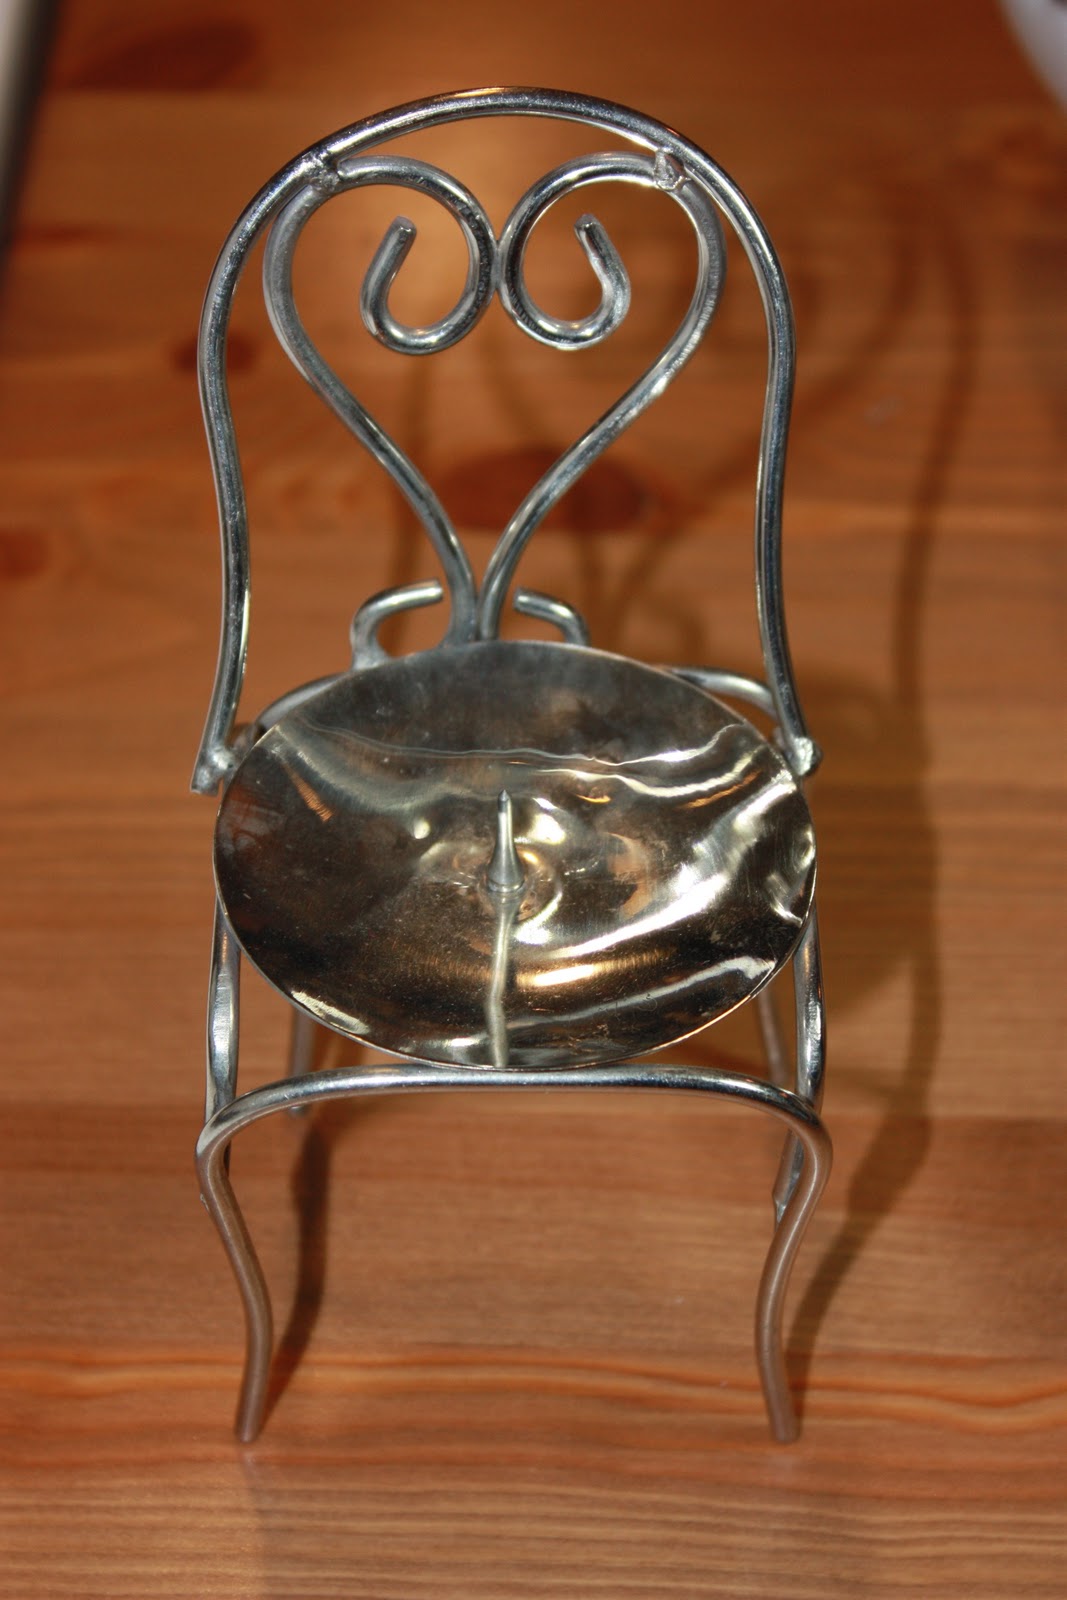
I think it is time to share a tutorial for this cute little repurposed candle holder.


This pincushion happened quite by accident.  I was thrifting at our local Value Village and found this cute little chair.

It used to be a candle holder but to me it just screamed PINCUSHION!  So it came home with me and we started its transformation.
I hadn't thought of a tutorial when I started so I don't have a lot of pictures but it is so easy you won't have any trouble.

Here is what you will need:

A holder of your choice
Two small pieces of fabric about 5 inches square
Light interfacing to match
Polyfil (stuffing)
a cute button
Thread to match
Some type of floss (I used crochet cotton)
Needle with a large eye
Marking pen
Fray Check
Hot Glue gun- loaded!

I measured the seat of the chair (base of the candle holder) which was three inches.  I didn't want the cushion to be too high cause then I wouldn't be able to see the fancy back so cut decided to cut my circles
4 1/2 inches diameter.  I used my Olfa circle cutter  but you can do it however you like. Accuquilt Go! die cutter, saucer, free hand, what ever works!

Apply the light interfacing on both circles as per the manufacturers instructions.  I find it really helps with the structure and it makes it easier to pull and push the pins with the added stability.

With right sides facing, sew around the circles leaving a gap about an inch and a half for turning.  I used generous 1/4 inch seams.  Clip your edges and turn right side out.  Smooth circle by using a chop stick (your favourite gadget) to push the seam out completely.  Stuff the cushion to desired fullness and hand stitch the opening shut.  I use a ladder stitch because I don't like the stitches to show but you can whip stitch it if you like.


Find the centre of the top of the cushion and mark it with fading ink. I eyeballed it but you can measure!
Using your floss (knotted) and needle and starting from the bottom of the cushion come up through to the centre mark and add the cute button. Take a few stitches to secure the button.  Once you pass the thread through the cushion to the bottom side begin to make the sections of the cushion by bringing the thread up around the cushion edge instead of up through it. I made six sections, of course you can do more or less. Finish at the bottom centre and knot your floss and cut it.

Since I knew that the chair used to be a candle holder with a spike, I figured that I could push this cushion onto it for more stability. However, I didn't want my fabric to fray, so on the bottom at the centre point, I put a few drops of Fray Check.


Now with the cushion ready it is time for the chair.  After the surface is cleaned (this is thrifted after all) apply a generous amount of hot glue to the seat area.  Then firmly push the cushion down. Not so much that the spike pops through but enough so that it is well in place.


Add a few pins and it is ready to go!

Monday, April 18, 2011

I thought it was spring!?

Well, last week we had beautiful spring weather.  The kids and I went for a lovely walk and took lots of great pictures of the arrival of spring.  These two are my favourites:
This is a pond near our house and we love feeding the ducks here all summer.
These are winter berries covering a grate with run off water rushing underneath it.
                                    
Now however......we are completely covered in about 6 inches of snow which is covered with a sheet of frozen rain and another dusting of snow is falling as we speak!  So much for my daffodils that we peaking through the ground!

On the other hand, the nasty storm had me held up inside so at least I got somethings done.  Most importantly of course was my granddaughters quilt.  It was waiting for a label and a wash.  This is my first rag quilt and the first time using my new Accuquilt GO! fabric cutter.  It was cut using the 8" rag die which made it much simpler than using snips to cut it afterwards.  I had no idea how it would turn out but everyone loves it in my house so I hope that she loves it too! Figuring out the label was the hardest part but now that it is done I love it! I labelled it this morning and my hubby took it to the laundry mat this afternoon to wash it..... he wanted to have some part in this gift!
This is the front

This is the back.  Can you see my little mistake? One of the heart squares is the wrong way!  I  was sooooo cautious with this part of the quilt....yet a square is still side ways!  So, I am leaving it because obviously that is how it was supposed to be!  Quilts are not "supposed" to be perfect. 

This is the label before the wash.

This is after the wash!

I love the border behind the label!

Look at how fluffy!! I love it!
Well, that is it for the baby quilt until there is a baby on or under it!  Thanks for sharing it with me.

Have a great week!

Penny