I think it is time to share a tutorial for this cute little repurposed candle holder.

This pincushion happened quite by accident. I was thrifting at our local Value Village and found this cute little chair.
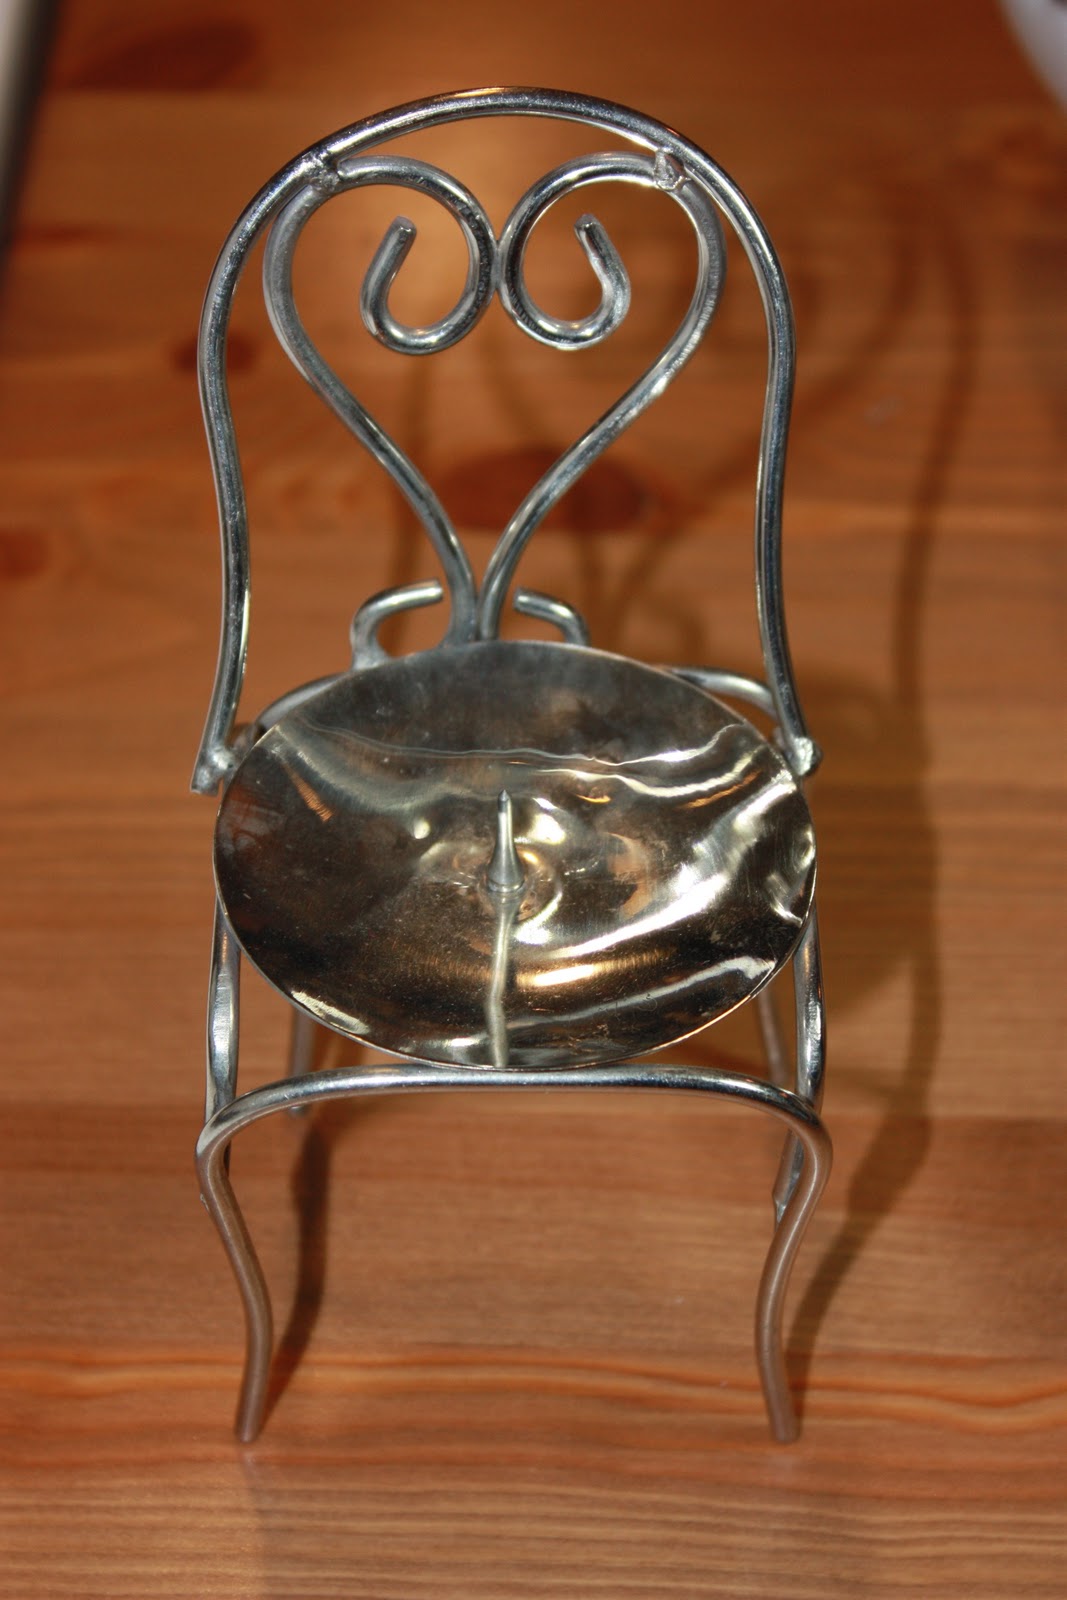
It used to be a candle holder but to me it just screamed PINCUSHION! So it came home with me and we started its transformation.
I hadn't thought of a tutorial when I started so I don't have a lot of pictures but it is so easy you won't have any trouble.
Here is what you will need:
A holder of your choice
Two small pieces of fabric about 5 inches square
Light interfacing to match
Polyfil (stuffing)
a cute button
Thread to match
Some type of floss (I used crochet cotton)
Needle with a large eye
Marking pen
Fray Check
Hot Glue gun- loaded!
I measured the seat of the chair (base of the candle holder) which was three inches. I didn't want the cushion to be too high cause then I wouldn't be able to see the fancy back so cut decided to cut my circles
4 1/2 inches diameter. I used my Olfa circle cutter but you can do it however you like. Accuquilt Go! die cutter, saucer, free hand, what ever works!
Apply the light interfacing on both circles as per the manufacturers instructions. I find it really helps with the structure and it makes it easier to pull and push the pins with the added stability.
With right sides facing, sew around the circles leaving a gap about an inch and a half for turning. I used generous 1/4 inch seams. Clip your edges and turn right side out. Smooth circle by using a chop stick (your favourite gadget) to push the seam out completely. Stuff the cushion to desired fullness and hand stitch the opening shut. I use a ladder stitch because I don't like the stitches to show but you can whip stitch it if you like.

Find the centre of the top of the cushion and mark it with fading ink. I eyeballed it but you can measure!
Using your floss (knotted) and needle and starting from the bottom of the cushion come up through to the centre mark and add the cute button. Take a few stitches to secure the button. Once you pass the thread through the cushion to the bottom side begin to make the sections of the cushion by bringing the thread up around the cushion edge instead of up through it. I made six sections, of course you can do more or less. Finish at the bottom centre and knot your floss and cut it.

Since I knew that the chair used to be a candle holder with a spike, I figured that I could push this cushion onto it for more stability. However, I didn't want my fabric to fray, so on the bottom at the centre point, I put a few drops of Fray Check.

Now with the cushion ready it is time for the chair. After the surface is cleaned (this is thrifted after all) apply a generous amount of hot glue to the seat area. Then firmly push the cushion down. Not so much that the spike pops through but enough so that it is well in place.

Add a few pins and it is ready to go!
5 comments:
I think that this was a brilliant idea! I so love it. You are inspiring me to work on my blog (which I just posted on for the first time in a long time) and get it going...i will need to do something while i recover from surgery lol. Thanks for all the tips! Great job mamma!
Bee
What a great idea...a great gift idea. I would have never thought to use candle holders like that. Very cute!!
How very cute! Great way to repurpose a candle holder.
Isn't that the nicest looking pincushion! Love it.
Love for you to link up at:
"Made by ME" Linky Party at JAQS at http://www.jaqsstudio.com/2011/10/made-by-me-4-linky-party-and-features.html
ok, that is just adorable! I will have to look for some kind of holder like that...I am betting I can scrounge something up!
Post a Comment